Living in Tampa comes with its perks – sunny weather, beautiful beaches, and a laid-back lifestyle. But Tampa’s unique climate also brings challenges, especially when it comes to your home’s roof. If you’re considering a roof installation Tampa, it’s important to make informed decisions that protect your home from the elements while enhancing its aesthetic appeal. In this guide, we’ll walk you through everything you need to know about roof installation in Tampa, from choosing the right materials to maintaining your new roof after the installation.
Why the Climate Matters for Roof Installation
Tampa’s climate is a combination of hot, humid summers and mild, rainy winters. It’s also prone to tropical storms and hurricanes, which means your roof needs to be strong enough to withstand intense wind, rain, and the occasional flying debris. Choosing the right materials and installation techniques is crucial to ensuring your roof stands up to Tampa’s unpredictable weather patterns.
Choosing the Right Roofing Material
Asphalt Shingles
Asphalt shingles
Asphalt shingles are one of the most popular choices for Tampa homes due to their affordability and durability. They are designed to withstand strong winds and can be treated to resist algae growth, which is a common issue in humid climates like Tampa.
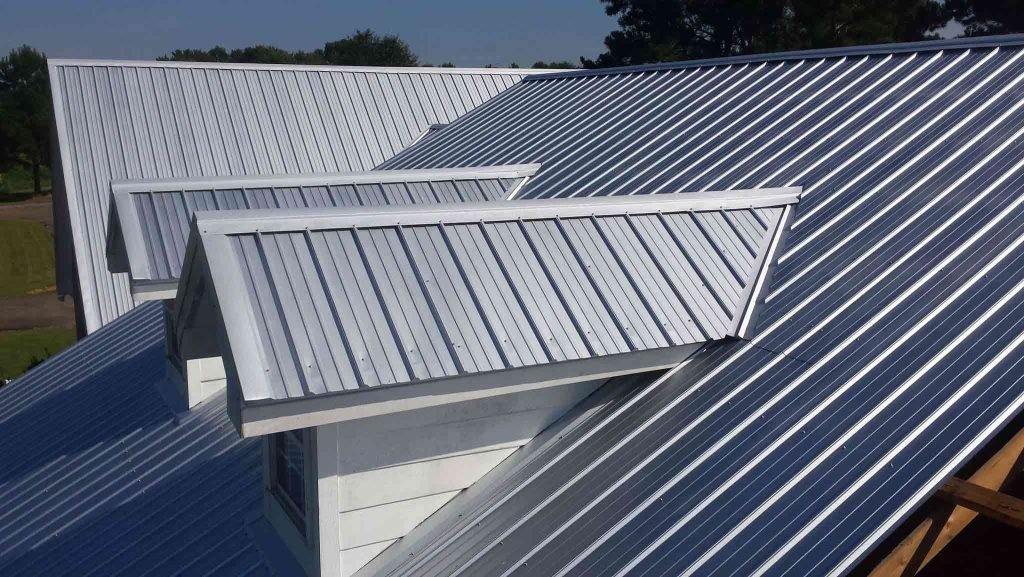
Metal Roofing
Metal roofing is another excellent choice for Tampa homeowners. Metal roofs are incredibly durable and can last up to 50 years or more. They also reflect heat, which can help reduce cooling costs in Tampa’s hot summers.
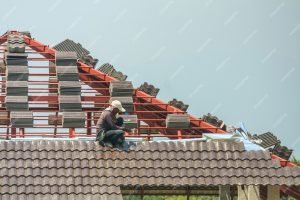
Tile Roofing
Tile roofing, particularly clay or concrete tiles, is ideal for homes with a Mediterranean or Spanish style. These roofs are extremely durable and can last for decades with proper maintenance. However, they are heavier than other materials, so you’ll need to ensure your home’s structure can support the weight.
Flat Roof Options
For homes with a flat or low-slope roof, materials such as modified bitumen or single-ply membranes are common. These materials offer excellent water resistance, which is important given Tampa’s rainy seasons.
Hiring the Right Contractor
Questions to Ask Your Contractor
When hiring a contractor for roof installation in Tampa, ask about their experience with local roofing projects, particularly in dealing with hurricane-prone areas. Ask for references, check online reviews, and verify that they are licensed and insured in the state of Florida.
Licensing and Insurance
Make sure your contractor has the proper licensing to work in Tampa and carries liability insurance. This protects both you and the contractor in case of accidents or damages during the roof installation process.
Preparing for Roof Installation
Homeowner’s Checklist
Before installation begins, remove any valuables from the attic, clear the area around your home, and inform your neighbors of the project. Roof installation can be noisy, and the last thing you want is for debris to damage your property.
What to Expect During the Process
Roof installation typically involves stripping off the old roof, making any necessary repairs to the underlying structure, and then installing the new roofing material. Expect a few days of noise and disruption, but the end result will be worth it.
Roof Installation Process
Step-by-Step Overview
- Removal of Old Roof: The first step is to remove the existing roofing materials, whether it’s asphalt shingles, metal, or tile.
- Inspection of Roof Decking: After removal, the contractor will inspect the roof decking for any damage that needs repair.
- Installation of Underlayment: A water-resistant underlayment is installed to provide an extra layer of protection.
- Installation of Roofing Material: Depending on the chosen material, the shingles, tiles, or metal sheets are laid down.
- Final Touches: Flashing, ridge vents, and other elements are added to ensure the roof is fully sealed.
Timeline for a Typical Installation
A typical roof installation in Tampa can take anywhere from two to five days, depending on the size of the roof, the materials used, and weather conditions.
Common Challenges in Roof Installation
Weather Delays
In Tampa, weather can be unpredictable. Be prepared for potential delays due to rain or high winds, which can slow down the installation process.
Unexpected Structural Issues
Occasionally, contractors may discover structural issues with the roof decking or framing that need to be addressed before installation can continue. These issues can add time and cost to the project.
Maintenance Tips After Installation
Regular Inspections
To keep your new roof in top shape, schedule regular inspections, especially after major storms. This helps catch any damage early before it becomes a bigger issue.
Cleaning Gutters and Roof Surfaces
Clogged gutters and debris on the roof can lead to water damage. Make sure to clean your gutters regularly and keep your roof clear of leaves and branches.
Costs Involved in Roof Installation
Material Costs
The cost of roofing materials varies widely depending on the type of material you choose. Asphalt shingles are generally the most affordable option, while metal and tile roofs can be more expensive.
Labor Costs
Labor costs will depend on the complexity of the roof installation and the experience of the contractor. Be sure to get several quotes to compare pricing.
How to Choose the Best Warranty
Manufacturer’s Warranty
Most roofing materials come with a manufacturer’s warranty that covers defects in the material. Be sure to read the fine print to understand what is covered and for how long.
Workmanship Warranty
Your contractor should offer a workmanship warranty, which covers any issues that arise from improper installation. This warranty typically lasts for several years.