A roof is more than just a cover for your home; it is a crucial component that protects the entire structure and everything inside it from the elements. Whether you are building a new home, renovating an existing one, or replacing an old, worn-out roof, understanding the nuances of roof installation is essential. This comprehensive guide will walk you through the process of roof installation, from selecting the right materials to ensuring proper installation techniques. By the end of this article, you’ll be equipped with the knowledge to make informed decisions and ensure your roof provides lasting protection and peace of mind.
Choosing the Right Roofing
MaterialsThe first step in any roof installation project is selecting the appropriate materials. The choice of roofing materials will significantly impact the durability, aesthetics, and cost of your roof. Here are some common roofing materials and their benefits:
- Asphalt Shingles: These are the most popular roofing materials in the USA due to their affordability and ease of installation. Asphalt shingles come in various styles and colors, offering versatility in design. They have a lifespan of 20-30 years, making them a cost-effective option for many homeowners.
- Metal Roofing: Metal roofs are known for their longevity and durability. They can last up to 50 years or more with proper maintenance. Metal roofing is also energy-efficient, reflecting sunlight and reducing cooling costs in hot climates. Additionally, it is fire-resistant and can withstand harsh weather conditions.
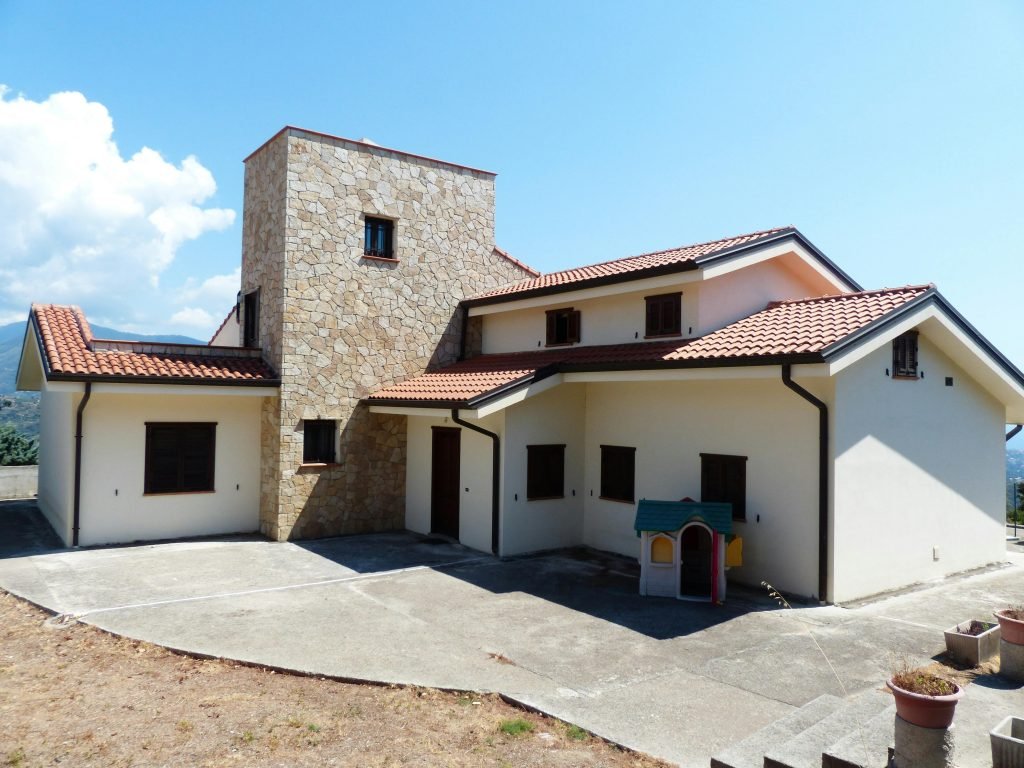
- Clay and Concrete Tiles: These materials are favored for their classic and elegant appearance. Clay and concrete tiles are highly durable and can last over 50 years. They are also resistant to fire and pests. However, they are heavier than other materials, requiring a robust roof structure for support.
- Wood Shingles and Shakes: Wood roofing offers a natural and rustic look. Cedar, redwood, and pine are commonly used wood types for shingles and shakes. Wood roofs have a lifespan of 20-40 years, depending on the type of wood and maintenance. They are environmentally friendly but require regular upkeep to prevent rot and insect damage.
- Slate: Slate roofs are known for their beauty and exceptional durability. A slate roof can last over 100 years if properly installed and maintained. Slate is fire-resistant, environmentally friendly, and offers a unique, timeless appearance. However, it is one of the most expensive roofing materials and requires professional installation due to its weight.
The Roof Installation Process
Once you have chosen the right materials, the next step is the actual installation process. Proper installation is crucial to ensure the longevity and effectiveness of your roof. Here is a step-by-step guide to the roof installation process:
- Preparation and Planning: Before starting the installation, thorough planning is essential. This includes obtaining necessary permits, scheduling inspections, and ensuring safety measures are in place. It is also crucial to check the weather forecast and choose a period with favorable conditions for roof installation.
- Removing the Old Roof: If you are replacing an existing roof, the first step is to remove the old roofing materials. This process involves stripping off shingles, tiles, or metal panels, as well as any underlayment and flashing. Proper disposal of old materials is essential to avoid environmental impact and ensure safety.
- Inspecting and Repairing the Roof Deck: Once the old roof is removed, the roof deck needs to be inspected for any damage or rot. Any compromised areas should be repaired or replaced to provide a solid foundation for the new roof. This step is crucial for ensuring the structural integrity of the roof.
- Installing the Underlayment: The underlayment is a protective layer installed over the roof deck before the roofing materials. It acts as a barrier against moisture, preventing water from seeping into the roof deck. The type of underlayment used depends on the roofing material chosen and local building codes.
- Installing Flashing: Flashing is used to seal and protect vulnerable areas of the roof, such as valleys, chimneys, and vents. Proper installation of flashing is crucial to prevent water leaks and ensure the roof’s durability.
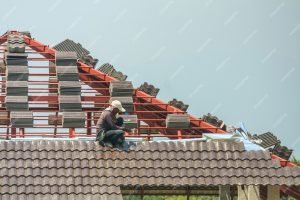
- Installing the Roofing Materials: The next step is installing the chosen roofing materials. This process varies depending on the material. For example, asphalt shingles are installed in overlapping rows, starting from the bottom of the roof and working upwards. Metal panels are secured with screws and clips, while tiles are individually placed and secured with mortar or adhesive.
- Ventilation and Insulation: Proper ventilation and insulation are essential for maintaining a healthy and energy-efficient roof. Ventilation allows for air circulation, preventing moisture buildup and extending the lifespan of the roof. Insulation helps regulate the temperature inside the home, reducing energy costs and improving comfort.
- Final Inspection and Cleanup: Once the installation is complete, a thorough inspection is necessary to ensure everything is correctly installed and meets local building codes. Any debris or leftover materials should be cleaned up, leaving the site tidy and safe.
Maintaining Your Roof
Regular maintenance is key to prolonging the life of your roof and preventing costly repairs. Here are some maintenance tips to keep your roof in top condition:
- Regular Inspections: Conduct regular inspections, especially after severe weather events. Look for signs of damage, such as missing or cracked shingles, rust on metal roofs, or broken tiles. Address any issues promptly to prevent further damage.
- Cleaning Gutters and Downspouts: Clogged gutters and downspouts can lead to water buildup and damage to the roof. Clean them regularly to ensure proper drainage and prevent water from backing up onto the roof.
- Removing Debris: Remove leaves, branches, and other debris from the roof to prevent water retention and damage to the roofing materials. Trim overhanging branches to minimize debris accumulation and reduce the risk of damage from falling branches.
- Moss and Algae Prevention: Moss and algae can cause damage to roofing materials, particularly shingles. Use moss and algae-resistant treatments or install zinc or copper strips along the ridge to prevent growth.
- Addressing Leaks Promptly: If you notice any signs of a leak, such as water stains on the ceiling or walls, address the issue immediately. Leaks can lead to significant damage if left untreated, compromising the roof’s integrity.
Conclusion
Roof installation is a critical aspect of home construction and maintenance, requiring careful planning, material selection, and professional execution. By understanding the process and choosing the right materials, you can ensure your roof provides lasting protection and enhances the value of your home. Regular maintenance and prompt repairs will further extend the lifespan of your roof, safeguarding your investment and providing peace of mind. Whether you are a homeowner looking to replace your roof or a contractor seeking to improve your installation techniques, this guide offers valuable insights to achieve a successful roof installation. Remember, a well-installed and maintained roof is the cornerstone of a safe and comfortable home.